What is a blotter book?
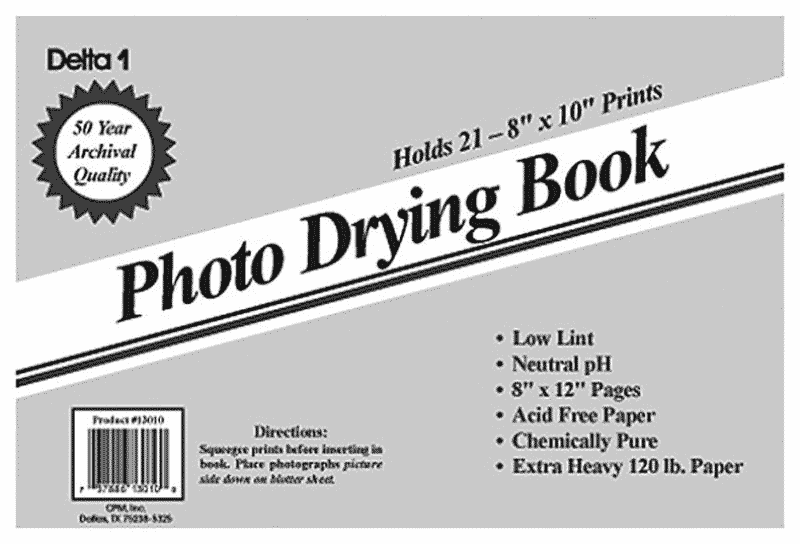
A blotter book, also called a print or photo drying book, is a traditional darkroom printing tool. No clever naming here, a blotter book is exactly what it says on the tin – a book of blotter paper sheets, usually divided with wax paper to prevent sticking. This simple yet effective accessory makes drying curl-prone fiber based prints an easy task.
Because of the sensitive nature of wet darkroom prints, photo drying books are comprised of blotting paper specifically designed for the task. First and foremost, the paper must be as close to lint-free as possible, so no fibers shed and embed themselves into the soft wet emulsion. In addition, to retain the archival properties of darkroom prints, drying book paper must be acid free and devoid of any chemicals that may transfer into the wet print and degrade it. Blotter book pages are typically buffered with calcium carbonate to eliminate acid transfer on prints.
Print drying books come in different sizes to match popular paper formats with a little room to spare. As pictured above, a blotter book for 8 x 10″ prints comes with 8 x 12″ pages. Blotter books are mostly used with fiber based darkroom prints. There’s no reason why you can’t use one with resin coated paper, but these prints dry so quick, that there is little point to do so. If you wonder about the other differences between resin coated and fiber based papers, do not miss our extensive article comparing them.

Why do you need a blotter book for darkroom printing?
A blotter book is by no mean an essential darkroom printing accessory, but it can make your life easier, especially in certain situations. For example, if you are printing in a tiny, makeshift darkroom in your spare bathroom, you might not have a lot of space to hang or lay your prints to dry on screens. A typical blotter book can hold over 20 prints while taking the countertop space for one. On top of that, you can stack them!
In addition to saving a lot of space, photo drying books can also keep your prints safer as they dry. Again, if you are printing in a domestic environment, keeping a bunch of fragile, wet prints from your kids or pets might not be an easy task. On the other hand, if you stash them in a blotter book, they might stand a fighting chance.
Even if you are printing in a dedicated darkroom, a photo drying book might still be worth considering. Why cut your printing session by 2 hours to stand around and wait for your prints to air dry? Instead, you can pop them out of the wash, squeegee them and take them home in your blotter book. In a crowded university darkroom, hanging your prints may be a risky affair even if you’ve got the time.
What are the disadvantages of blotter book print drying?
Of course, as with anything, ther are some drawbacks to blotters too. Chief among those is the time it takes to dry prints with them. Because all the drying happens through wicking of moisture through the blotter sheets, it may take 24hrs or more to get a reasonably dry print. This can be significantly reduced by squeeging all excess water from prints before placing them in the book, but it’s still a slower process. For comparison, air drying a print (on a line or a screen) usually takes a few hours, depending on conditions.
Another potential issue is that blotter drying might not be the best option for every paper. Some emulsions are softer than others, so they might stick to blotter sheets, pick up lint (even though there’s supposed to be none) or get embossed with the blotter sheet texture. There are no hard and fast rules here, so the only way to know for sure is to make tests. Before comitting to an important print, try a test strip or a contact sheet to see how the particular paper and blotter book you are using play together. Just make sure whatever test print you use is properly processed and thoroughly washed so as not to contaminate your drying book. You can find more details on that in the next chapter.
How is a blotter book used?
The blotter book is perhaps the simplest way of drying darkroom prints. It can also help with flatness, especially on those curl-happy single-weight fiber based papers. However, there’s a couple of things to keep in mind.
Cleanliness before all
The key to successfully drying your prints with a blotter book is utmost discipline in maintaining cleanliness. A blotter book works by absorbing the water out of the prints and then releasing it as it dries. If you place an insufficiently washed or otherwise contaminated print in the book, the blotter paper will absorb contaminants along with the water. Unlike water, however, the fixer or other pollutants will not evaporate. They will hang around, even when the blotter book is dry and ready to be used again. When you place a new print in the contaminated blotter book, the print will absorb the leftover contaminants, which will eventually lead to staining.
This is the single most important aspect of working with blotter books – you need to be sure your print is perfectly washed before you put it into the book. A good quality, properly looked after blotter book can last for decades. However, the moment your blotter book gets dirty or contaminated, you will need to replace it. A contaminated blotter book cannot be reliably cleaned, replace it or it will ruin your precious prints.
Step-by-step
So let’s see how the process works step by step:
- Take your processed and thorougly washed prints from the wash tray and try to shed as much water off them as you can. You can hang prints on a temporary line above your sink, or place them on screens to drip dry for a little while. The less water you bring into the blotter book, the faster your prints will dry.
- If you have the time and space, leave the prints to air dry until they start to curl slightly before putting them in the drying book. If not, you have to try and remove as much of the surface water as you can by hand. You can do that with the print face down on a clean piece of glass with a photo sponge, a photo roller or a squeegee. Be careful not to scratch or tear the wet paper, and make sure all your surfaces and tools are completely clean. With exerience you’ll find what the best method to do this is for you.
- Once the prints are ready for the blotter, begin placing them in the blotter starting with the last page. Starting from the back eliminates the need to turn pages with prints in them, reducing the risk of abrasion.
- Prints go in the book face down – with the image side facing the blotter paper. For maximum capacity, you can place two prints on each blotter book spread – one on each page, facing the blotter paper. In drying books with waxed dividing pages, make sure to place the image side of the print toward the blotting paper and the back of the print towards the wax paper.
- Once you have placed all your prints in the drying book, close it and put some weight evenly across the top to ensure prints dry as flat as possible. If you are transporting the blotter book before leaving it to dry, make sure it does not open or twist in transit. If you are placing it into a backpack or a bag it may be reasonable to tie the book shut with a strap or a string.
- Leave the book to dry under weight for about 24hrs before removing the dry prints. Depending on the temperature and humidity it may take longer or shorter than that.