New to darkroom printing? Boy, are you in for a treat! Darkroom printing is one of the most addictive elements of photography and is a whole universe unto itself. Masters like Ansel Adams and Edward Weston have shown us that taking the picture is just the first step of a journey. From developing through to printing, a negative has limitless possibilities in the darkroom and it’s all up to your imagination.
There are numerous darkroom printing guides and tutorials all over the web. Most darkroom supplies manufacturers have their own guides and tutorials, like this one by Fotospeed or this Ilford beginner’s guide. There are also great books on the subject, like Ansel Adams’ venerable The Print, Anchell’s The Variable Contrast Printing Manual and the more contemporary Way Beyond Monochrome. If you’ve never printed or seen others print before, this video by Ilford might help shed some light on the process.
At first glance, darkroom printing may look complicated and daunting. So you’ve got your negatives, your chemicals and paper, but what else do you need? Well, literally a dark room, for starters! That might seem simple enough, but getting a room properly darkened can be tricky. Luckily, we do have a very extensive guide that will teach you how to effectively black out pretty much any space.
And finally, we get to the topic of this guide – the printing equipment. As with every project out there, there are things you need and then there are things you want. Darkroom printing can be a complex, equipment heavy endeavor, but it does not have to be. Let’s start with the bare minimum. Here are the top 5 things you need to get before you begin!
Enlarger
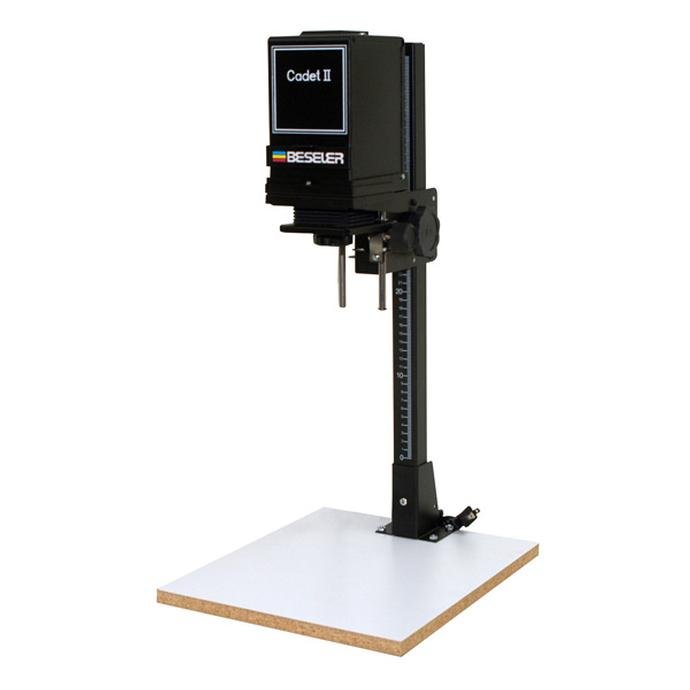
Obviously, the basis from which we start is the centerpiece of any darkroom, the enlarger. Unless you are doing contact printing, you are going to be needing one. Chances are, you are starting off with 35mm or 120 negatives, so you need to be looking for an enlarger that can work with these formats. Even though you can get separate 35mm and 120 enlargers, it’s best to start with a model that can handle all film formats you’d be working in.
New enlargers are not nearly as ubiquitous as they once were, but models like the Beseler Cadet can still be purchased online. However, used photography enlargers are cheap and plentiful, and this is where amazing deals can be had. As enlargers are big, bulky items that can be hard to ship, it’s best to start with local classifieds and listings. If you are a member of a local photographic community, ask around. Chances are, somebody has an old unit kicking about that they will be happy to give to a budding printer.
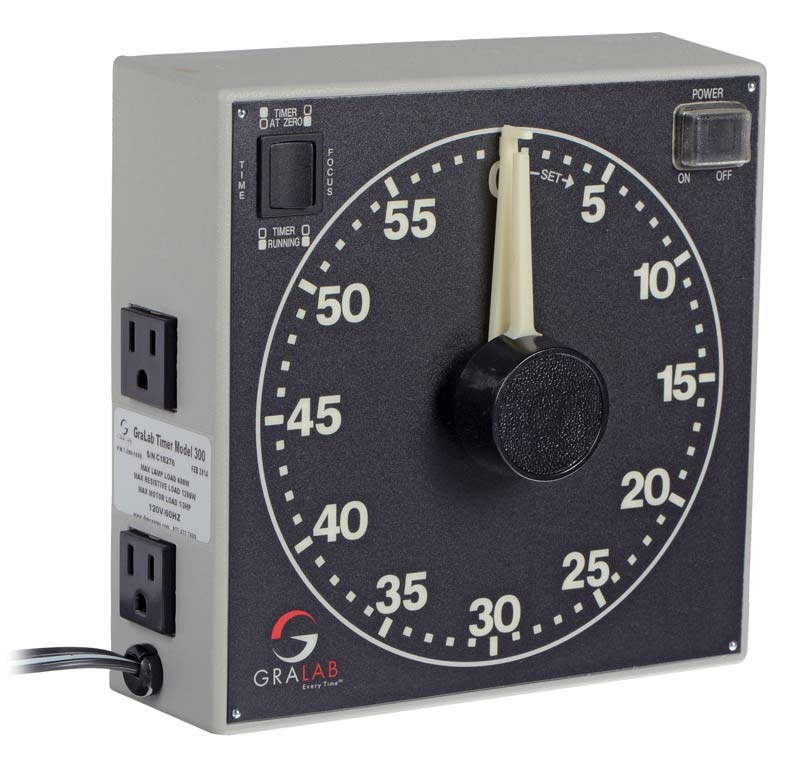
Timer
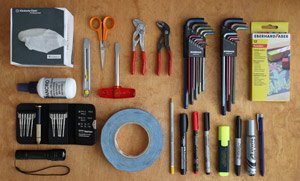
In order to time your printing exposures, you will be needing an enlarger timer. A timer is connected between the mains and the enlarger, and it keeps the enlarger bulb on for the exactly specified time that you set. It’s important that a timer is reliable and provides repeatable exposures. Some models, like the GraLab 300 pictured above, can even turn off the safelight during the exposure, giving you a clearer view for any dodging and burning.
Which one? If you are getting your enlarger second hand, more often than not you will be getting a timer with it. If not, Beseler, GraLab, CatLABS, Paterson and Heiland are few companies still manufacturing new darkroom timers. The GraLab 300 model is a classic, while the 451 model offers advanced functionality. RH Designs in the UK manufacture a range of sophisticated metering darkroom timers to streamline printing. There have also recently been IndieGoGo and Kickstarter campaigns for new darkroom timers like the MAYA. Check out our extensive Darkroom Timer Buying Guide to see all the options available on the market today.
In a pinch? While you wait for your timer, you can just use the enlarger light switch and time the exposures manually. If you want to try this, do yourself a favor and stop down that enlarger lens till you get exposures of >20 sec. This way, a deviation of +/- 1 second will not show up as significantly.
For shorter exposures, a neat trick is the use of a metronome. Even a metronome app on your phone will do the trick, just be careful not to fog your paper with the screen. Just set the metronome to 1 click per second, get in sync and count the clicks. It can be a very meditative way of making prints, and it’s also very helpful when doing any dodging and burning.
Regardless, if you are after any kind of repeatability in the darkroom printing process, you really do need a good timer.

Safelight
A safelight is essential in any darkroom, as it provides illumination without affecting the photographic materials. It is a type of lighting fixture used to provide working light in photographic darkrooms. By definition, the safelight is a light source emitting light in an area of the spectrum that does not affect the light-sensitive materials for which it is designed.
Which one? There are different safelights for different materials, but for the most popular photography papers that you might be starting with a traditional red safelight like the Kaiser above will do. Check the recommendations of the paper manufacturer. You can read all about photographic safelights in our extensive guide.
In a pinch? If you want to shop locally, search your hardware store’s lighting section for red LED bulbs. If you go down this route, make sure you test the light extensively or you can be in for a nasty surprise.
Testing a safelight Position the safelight as you will be having it during printing. Get a scrap of unexposed paper out of the box in complete darkness. Place the paper on the enlarger baseboard with a coin on top of it for 10-15 mins without switching on the enlarger or any other light. Develop and fix as normal. If you can make out where the coin has been, your safelight is not safe. Always do this test when introducing a new paper or a safelight.
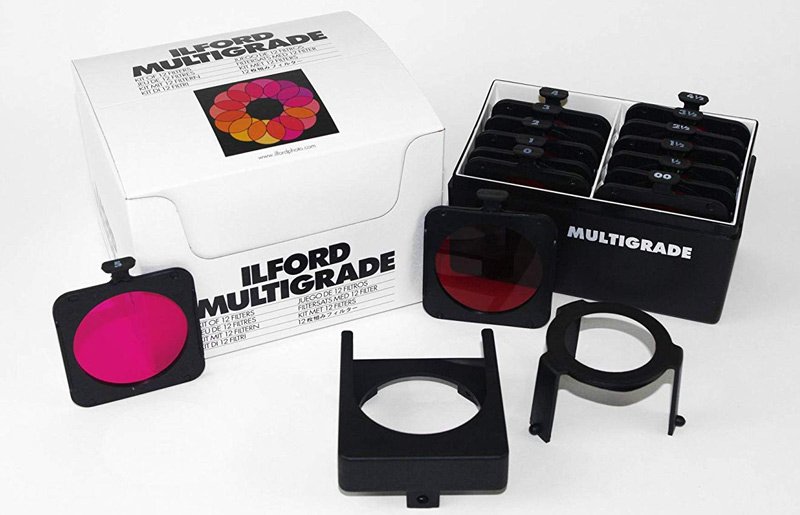
Multigrade filters
Chances are, the paper you will be printing on will be what’s known as variable contrast or multigrade. What this means is that the contrast of the print can be varied by changing the color of the light with which it is exposed. This is done either through variable contrast enlarger light sources or filter sets like the Ilford pictured above.
Which one? You need to start by looking at your enlarger. If it has a color or variable contrast head then you will not be needing an external filter set. If it does not have such a head, you need to identify what type of filters you will be using. They can be internal – ones that are put inside the enlarger, usually between the light source and the negative carrier, or external – ones that are placed under the lens, much like you use filters when taking pictures. If unsure, check the manual of your enlarger or ask a more experienced user.
If you are going to be using internal filters, you’ll need to buy gelatine sheet sets in the appropriate size. You might need to cut down the sheets to fit the filter tray of the enlarger. Ilford Multigrade filters are available in 8.9 x 8.9 cm (3.5×3.5″) and 15 x 15 cm (6×6″) sizes. Filter sizes 30 x 30cm (11.8 x 11.8 inches) are available to special order. Foma also makes variable contrast filter sets that can be cut to size.
If you are going for below the lens filters, you need to figure out a way of attaching the filters. The Ilford Multigrade set pictured above comes with a holder, but there might be some need for modifications depending on your enlarger setup.
In a pinch? You can print with variable contrast paper without filters. You will not have any contrast control, and the contrast you get will depend on the light source of the enlarger. Manufacturers usually list the default grade you will get without filters in the paper’s datasheet. Print contrast can also be manipulated through development, in the absence of filters, this can be worth looking into.
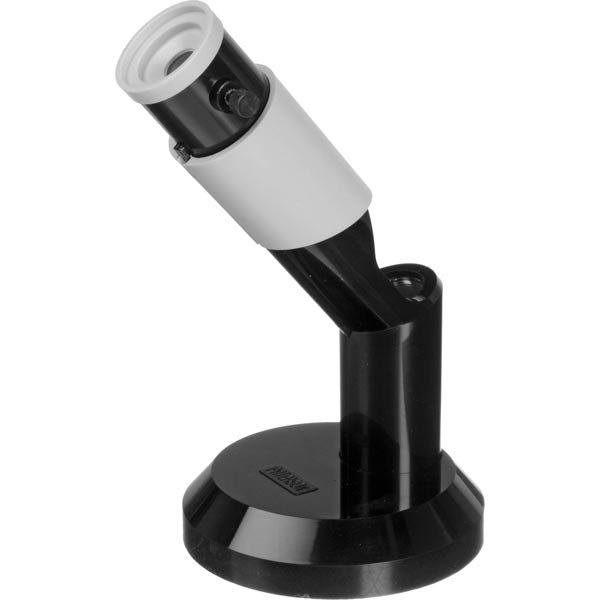
Focus finder
The focus finder is one of the most important darkroom printing accessories. It is used to verify the correct focus of the image projected on the printing easel by the enlarger. The high magnification (typically 20x) of the device enables you to see the grain of the emulsion. It is especially useful when printing very thin (underexposed) or thick (overexposed) negatives, or ones that lack fine detail to be focused by eye.
Even though you can usually focus an enlarger with the naked eye, the focus finder simplifies the procedure and eliminates the guesswork. With current prices of darkroom paper, an out of focus print can be a costly mistake. Using the focus finder might be tricky at first, but we have a very thorough guide to get you through.
Which one? Paterson Micro Focus Finder is by far the most popular model out there and is readily available brand new. As with timers, a lot of times when you buy a second-hand enlarger you’ll get one of these to sweeten the deal. Peak is another popular maker that offers higher-end models.
In a pinch? As discussed, you can focus the enlarger without a grain focuser, especially if your negative has a lot of fine detail and good contrast. When dense or thin negatives with large featureless areas (sky etc.) are involved is where this may fail you. You can try to use a regular magnifier to view the image projected on the baseboard, but it’s tricky at best.
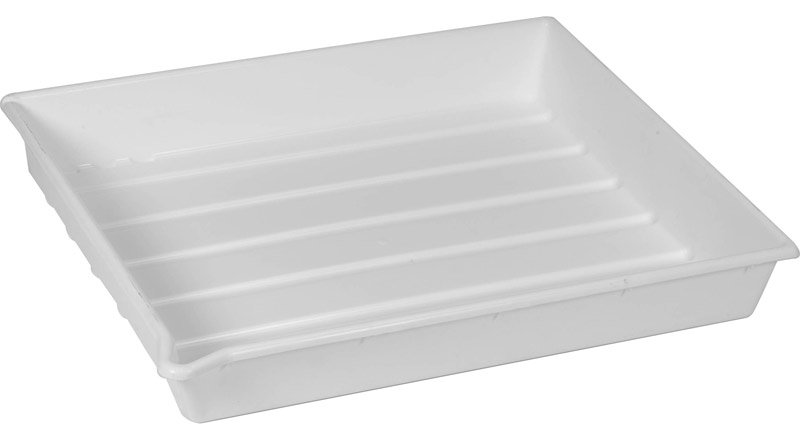
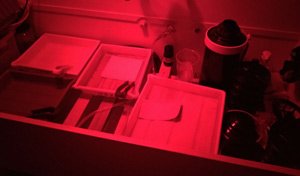
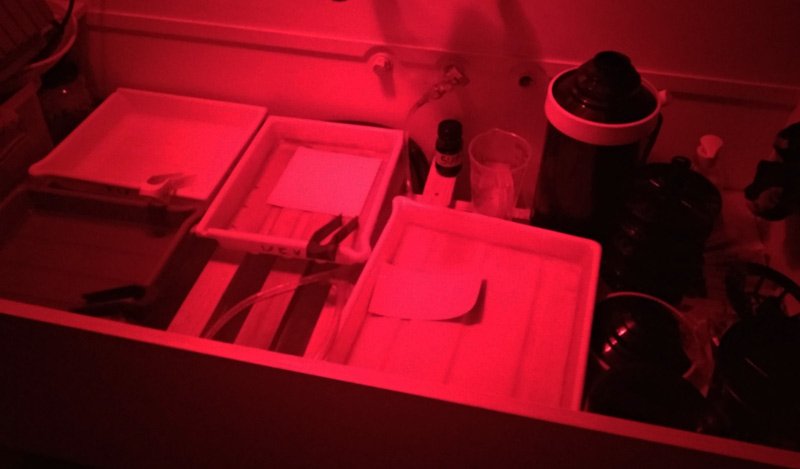
Trays
The next essentials you will be needing are print developing trays. These are flat containers that will hold your chemicals and through which you will run your prints. To start with the basic process, you will be needing 4 separate containers. These will hold the paper developer, stop bath, fixer and washing water.
Which ones? Paterson trays are the most popular and are still readily available in most sizes. Their trays come in sizes to match the most popular paper sizes – 8×10″, 12×16″, 16×20″ and 20×24″. You can use larger trays for smaller prints but bear in mind the increased chemical quantities that you will be needing. It might be wasteful to fill a big 20×24″ developer tray just to process a few 5×7 prints.
It’s best to have a few sets of trays to match your needs. However, to get you started, you need to figure out which paper format you will be using the most and get a set of trays in it. The only container that has to be bigger is the wash one. As you will probably be keeping multiple prints there at a time, it pays to have a larger volume of water for them to float in. A plastic storage container or a washing tub works fine for a wash tray.
In a pinch? You can improvise. Any flat plastic or glass container with the right size can work. With flat bottomed containers there a risk of a print sticking to the bottom. If you look at the picture of the Paterson tray you will notice it has channels running along the bottom. This prevents sticking and enables the chemistry to reach the underside of the print.
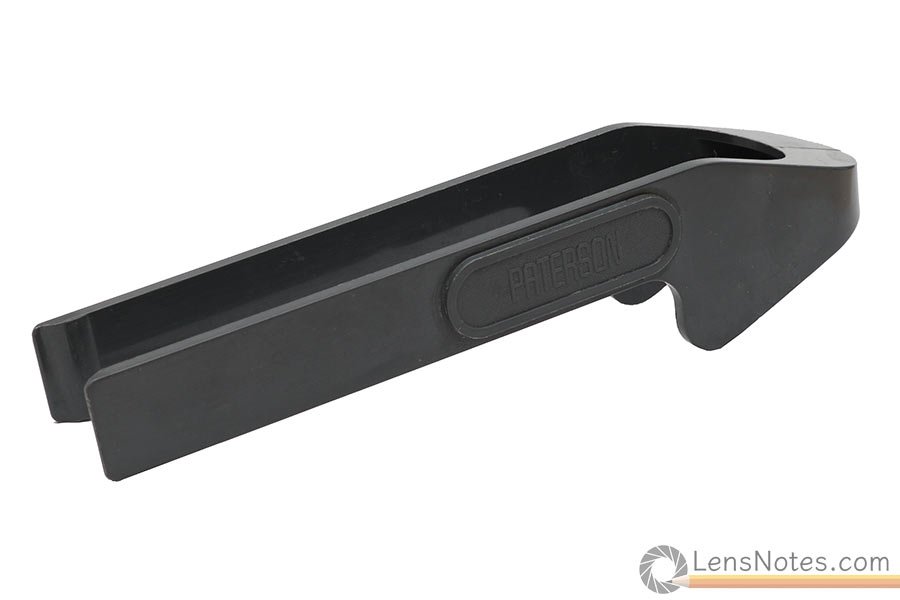
Tongs
Technically, you can work without tongs but they are highly recommended. You will be using them to get the wet prints from one tray to the next. Ideally, you will have one tong for each solution – developer, stop and fixer. Tongs usually come in color-coded sets of three to match the trays and solutions. You can also label them with a sharpie.
Typical printing chemistry that you will be starting with is mild enough that you can handle the wet prints by hand, but it’s not the best idea. Apart from exposing your skin and risking a reaction, the chance of cross-contamination between chemicals is much larger this way. If you must, use some nitrile gloves and rinse your hands in between the different steps.
Which ones? Again, Paterson is the market leader here, their plastic tong sets are the easiest to find and use. They come in packs of three, matching the colors of the Paterson trays and are designed to be rested on the edge without falling in the solution. The tongs are one piece, made of smooth plastic which enables thorough cleaning.
There are also bamboo and stainless steel print tongs on the market, but we’ve found the plastic ones to be easiest to work with. Bamboo, being wood, will naturally retain chemicals and increase the chances of contamination. Both bamboo and stainless tongs need rubber caps on the grabbing end to improve friction. This makes them harder to clean and is another source of potential contamination.
In a pinch? Wooden food tongs (like this bamboo set) can be found in any big box store. Any model will technically do, as long as the grabbing ends are not too aggressively shaped. However, wood will retain chemicals, so make sure you label them properly or you will be contaminating your chemicals. And, of course, do not mix them with your food utensils.

Clips & Line
An often overlooked part of the darkroom printing process is print drying. It’s easy to get carried away in all the excitement of the images magically appearing in the developer tray. But don’t forget that at the end of the session you will have a bunch of wet, fragile paper sheets to dry.
There are many different approaches to this, and drying fiber based prints is an art of it’s own. However, the easiest and most accessible way to start is with a simple line and some clips. Ideally, you need to string the line somewhere out of the way, as prints will be hanging there for at least a couple of hours. Also, some water will probably drip, so pay attention to what the flooring is, and maybe lay some protection if needed.
Which ones? Any clothes line or simple string you have lying about will do. If you are building a semi permanent setup, a retractable clothes line may save you some time and hassle.
Simple plastic clothes pins work for most smaller print sizes. They may not have enough grip to hang onto larger prints, so if you are printing anything above 8 x 10″s look into sturdier versions. Metal office binder clips do work well for all print formats, but keep an eye on them as they will eventually rust and start staining your prints.
In a pinch? If you are printing in a small space and absolutely cannot fit a line you may look into blotter books for your print drying needs.