
What is the Sharper Image Instant Camera?
After the demise of the Polaroid company in the 2000s, few people could predict the resurgence instant camera market would see just a few years later. Instant photography seems to be all the rage these days, with film and camera availability at an all-time high.
The same companies have dominated the instant photography market for as long as it’s been around. Polaroid has come back in yet another incarnation, and Fuji has never left the market. However, a slew of new companies has entered and diversified the field. From heavyweights like Kodak and Canon to niche players like Lomo, everybody wants a slice of the instant cake.
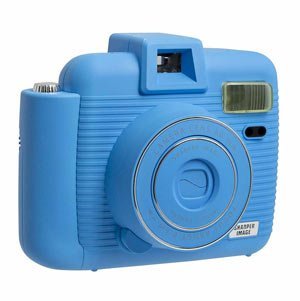
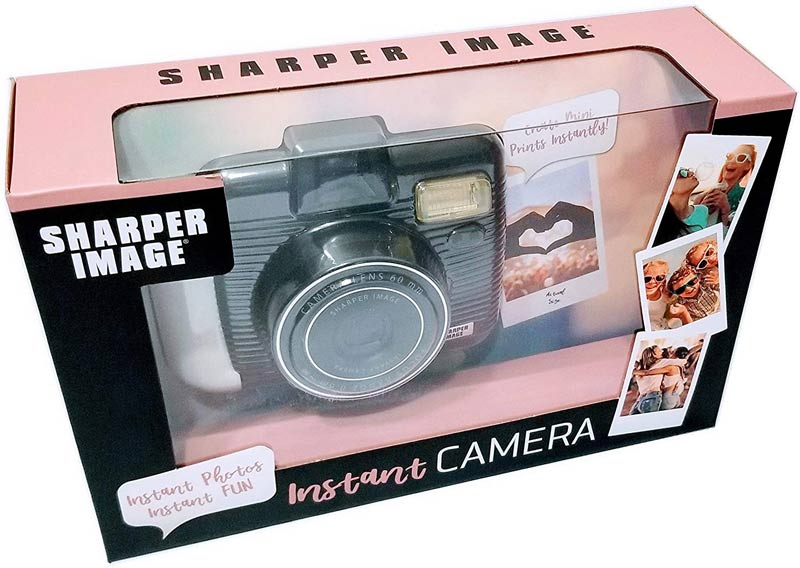
This is where the Sharper Image Instant Camera comes in. Not a revolutionary product by any means, it is essentially a rebranded version of the Fujifilm Instax Mini 8. It uses the same Fujifilm Instax Mini Film and offers pretty much the same user experience. At about half the price of the Instax (often reduced at Walmart), the Sharper Image Instant Camera comes in three colors – black, baby blue and pink. It’s a cheap and cheerful way into the instant photography hype.
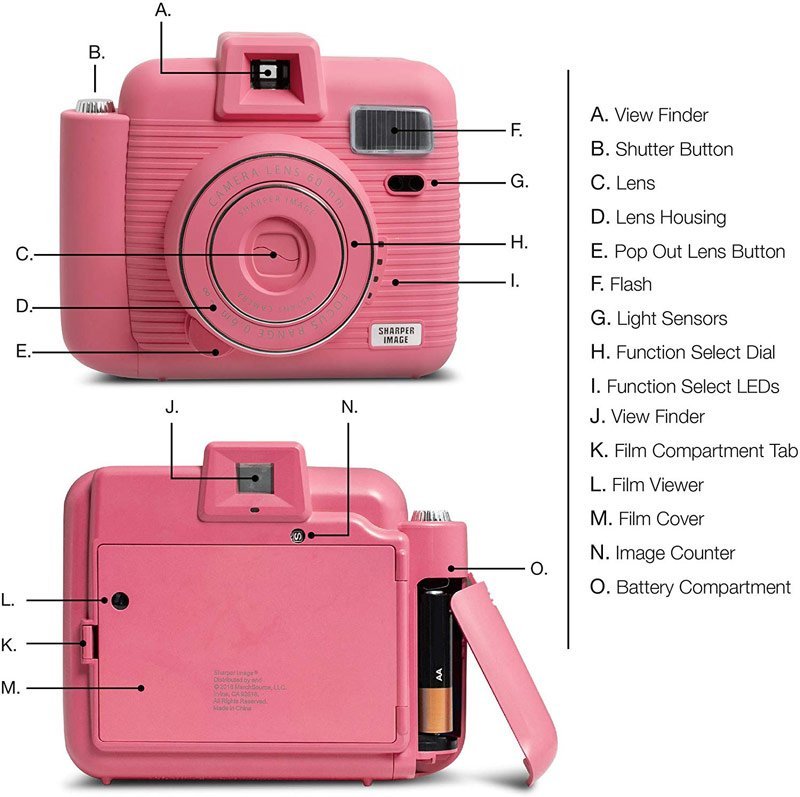
Unlike it’s modern cousins like the Canon CLIQ and the Kodak Smile the Sharper Image Instant Camera is a classic analogue instant camera. It uses traditional light sensitive photo paper cartridges and does not keep digital versions of the shots you take. The camera is not burdened with any unnecessary bells and whistles and is simple enough to be operated by anyone. However, it does come with some advanced features not commonly found on other instant cameras. It’s, therefore, best to familiarize yourself with its functions and settings to achieve the best possible results.
Here are some specs:
- Film Format: Fujifilm Instax Mini Film
- Uses Hi-Speed ISO 800 instant film
- Image Size: 62 x 46mm / 2.44” x 1.81”
- 60mm camera lens with 1/60 second shutter speed
- Shooting/focal range: 0.6m – infinity
- Real image type viewfinder
- Automatic flash
- 5-minute auto power-off function
- Also includes a camera strap and two AA batteries
How to use the Sharper Image Instant Camera?
As the camera comes with no instructions or a manual, it can be a bit daunting at first. Here are a few tips to get you started:
Loading
First, you need to load the camera with film and batteries. Unlike older instant film cartridges, the Instax Mini film packs do not have built-in batteries. Therefore, the Sharper Image Instant Camera uses 2 AA batteries that are included in the package. Pay attention to the direction the batteries go in, as it’s not immediately obvious. The first battery goes in with the positive terminal up, the second one goes in positive terminal down. Make sure you keep the little fabric pull tab under the batteries as you slide them in. It will help you remove them when it’s time for new ones.
The camera can be loaded with film in daylight (preferably not direct sunlight if possible), you don’t need a dark room or a safelight. To put the film cassette in, you need to open the back door by depressing the latch on the left-hand side. Unpack the film cassette from the foil envelope it comes in, and slide it into the camera. The thinner side of the cassette goes in first into the hinge side of the camera. There is a yellow marker onto the back of the camera and a corresponding yellow marker onto the cassette. These should line up. Once the cassette is in place, the camera cover should close without any pressure or compression.
Powering up
There’s one more step to do before your camera is ready to take pictures. With the new cassette loaded and the cover closed, turn on the camera. It does not have an on/off button, so don’t go looking for one. Instead, there is a lens pop-out button on the front. Once the lens is extended, the camera is automatically switched on. To turn it off, simply push the lens back into the body until it latches in. The 60mm lens has an automatic lens cover so there is no lens cap to keep track of.
When you turn on the camera after loading a new film cartridge, you will notice that the red LED indicator below the viewfinder eyepiece will start to blink slowly. This lets you know that the casette still has it’s cover shot in place. You need to take one blank shot (just press the shutter button without aiming or composing an image) to extract the cover and prime the camera for action. Once you do that, the red LED will turn off and the frame counter will turn to 10, indicating you have 10 more exposures left in the pack.
If the lens is left in the extended position, and the camera is on for 5 minutes without shooting, it powers off to save energy. It can be reactivated by pressing the lens pop-out button again. If the red LED indicator we mentioned earlier starts blinking fast, the camera is telling you that it’s batteries are dead.
Exposure settings
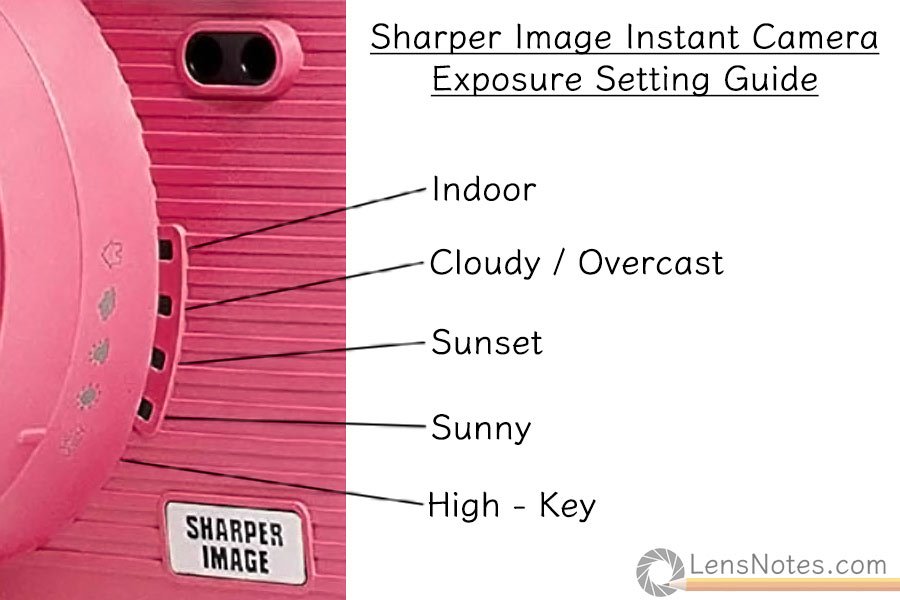
Not the most basic instant camera out there, the Sharper Image does have an exposure setting for you to play with. There are five different brightness levels you can choose for different lighting conditions both outdoors and indoors. Pay attention to those, as they do affect the exposure significantly. The five settings are Indoor, Cloudy / Overcast, Sunset, Sunny and High Key and they are selected from the function dial around the lens. The names of these settings are self explanatory, select the one you feel best suits your lighting environment at the moment, or let the camera tell you what it thinks.
The Sharper Image Instant Camera has a built-in exposure meter to help you set the correct exposure setting. An LED exposure indicator lights up next to the setting most appropriate for the metered scene. All settings except for High Key have an exposure meter LED indicator next to them. To meter a scene, point the camera in the general direction of the photo you will be taking and see which LED indicator lights up. Once it does, simply rotate the function dial to this position. While metering, make sure that the light sensors that are below the flash are clear and not obstructed by your fingers or a strap, as this will skew the readings.
High Key mode is a special mode which essentially makes your photos brighter than normal. It works best in low light such as a semi-dark interior or at dusk. Using High Key mode in full sunlight will likely result in an unusably overexposed shot. You can determine wheter High Key mode will work by paying attention to the exposure LEDs. High Key mode itself does not have a meter LED next to it, so the camera will never tell you when it may be a good time for it. However, if the Indoor LED is lit, this means illumination levels are low enough that High Key mode will likely yield nice results too.
An important detail to keep an eye on: every time the lens is closed, the camera defaults to Indoor mode. Make sure you change it if you are shooting outside or you will end up with severely overexposed images.
Flash
The flash is automatic, so it should come on whenever the built-in light meter decides ambient light levels are low enough. There is no manual control over the flash. While it should stay off in a bright environment, there’s no way to tell whether it will or won’t decide to flash. If you do not want flash in your picture, you can cover the flash window with some duct tape or a finger when you shoot.
Sharper Image Instant Camera Film Options
There seems to be a bit of confusion as to what kind of film the Sharper Image Instant Camera uses. This is due to the unclear specs listed on some of the packagings. They add to the mystery of the little camera, but may also be responsible for its poor sales.
Fujifilm Instax Mini Film
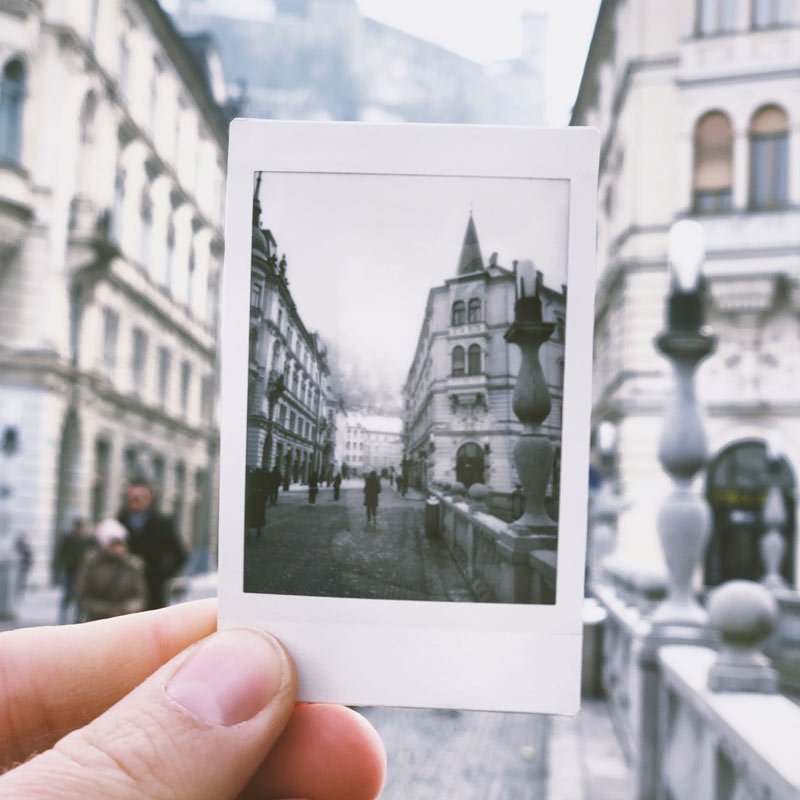
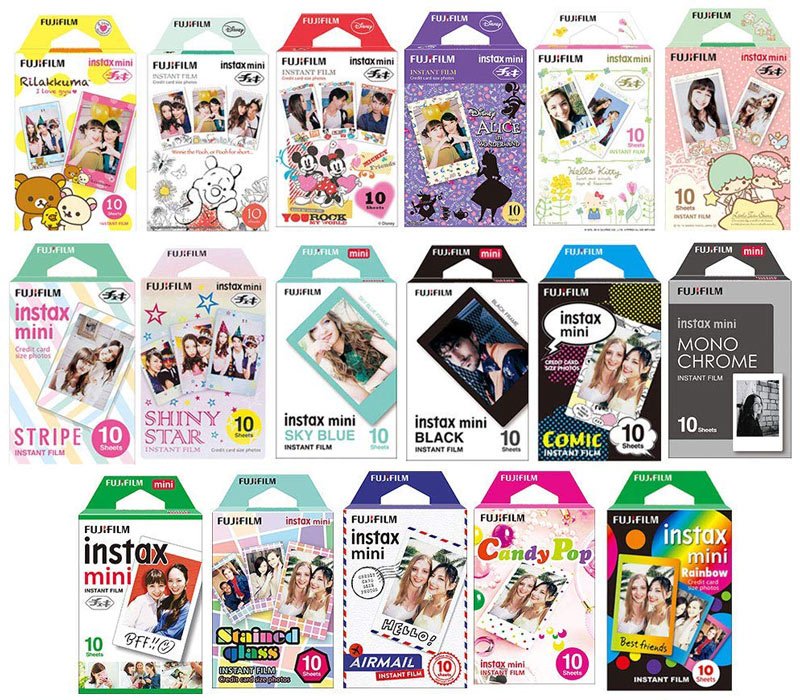
The Sharper Image Instant Camera is designed to use Fujifilm Instax Mini Film refills. It is a credit card size, 800 ISO color film with each sheet measuring 5. 4 x 8. 6 cm. The images within those sheets measure 6.2 x 4.6 cm or 2.44” x 1.81” and there are 10 sheets per pack. The film is daylight (5500K) balanced and the resulting print has a durable glossy surface. For best value, get the 5 pack 50 sheet bundle or the 100 shot mega pack.
You can also use any of the various specialty frame films like the Instax Mini Stripe Film, the Candy Pop Film, the Sky Blue or the stylish Black version. All of them use the exact same 800 ISO emulsion and produce the exact same pictures, just framed differently. If you are feeling artsy you can also try the cool black and white film Fuji offers. You can opt for one of many variety packs on offer that allow you to try a bunch of fun frames.
Polaroid PIF300 Film
Although not officially supported, the Sharper Image camera also works with Polaroid PIF300 film. There is no reason why it shouldn’t, the film is designed for use and compatible with the Fujifilm Instax Mini 9 Instant Camera & the full mini line of the Fujifilm Instax Cameras. Despite the 300 in the name, the film has the same 800ISO sensitivity as the Fujifilm Instax Mini, therefore no setting adjustment is necessary. The image quality is comparable, as is image permanence and durability.
Depending on where you shop, the price of PIF300 is usually similar to the Instax. Sometimes, due to the less known compatibility of the PIF300, there are deals to be had. Like the Instax, the PIF film usually comes in double packs of ten sheets each, but it’s better value to go for multiples. The 50 shot pack is a currently better value than the Fuji offers.
What do you think about the Sharper Image Instant Camera? If you have any questions, do not hesitate to post in the comments below!
Sharper Image Instant Camera Q&A
Is it better to use Fujifilm or Polaroid film cartridges with the Sharper Image Instant Camera?
Although officially the Sharper Image Instant Camera only supports the Fujifilm Instax Mini film cartridges, there’s absolutely nothing wrong with using the compatible Polaroid PIF300 as well. In terms of image quality, permanence and ease of use both will perform equally well.
What might sway your choice can be the larger selection of specialty frames that Fujifilm offer, or the fact that it’s generally more readily available than the Polaroid alternative. However, if the classic white border pics are all you need, do not skip a deal on the PIF 300, should you stumble into one.
Can you use rechargeable batteries in the Sharper Image Instant Camera?
By all means, rechargeable batteries are absolutely fine to use in this camera. Not only you’ll be saving a bundle, but you will also be helping the environment. In addition, unlike alkalines, rechargeable batteries will not leak acid if left in there for a while, so they are an overall better option. The Sharper Image Instant Camera uses two AA batteries, so you can stick a couple of Eneloops and snap away.

Please explain the lightning selection a little bit more. Still trying to learn the settings. Thank you!!
Hi Alena, glad you’ve found our review useful in getting to know your camera. We have expanded the section about the metering and flash settings, let us know how it goes!
Great review, very useful and detailed. Thank you for taking the time to put this out there. Was trying to find the camera manual and went over the box contents several times, guess you dont need a manual for a device like this, HA! 5 stars for this publication.
Hi so i’ve done everything up to the inserting the film cassette and the camera won’t take a picture to remove the cover of the film and i don’t know what to do in order for the camera to work