What is a remote shutter release and how does it work?
A remote shutter release is a device used to trigger a camera from a distance. It is used when pressing the camera’s shutter button or built-in self timer is impossible, impractical or simply inconvenient. By remote shutter release we refer to the electronic devices that work with current digital and film cameras. Most vintage analogue cameras and large format lenses use mechanical cable releases which work a bit differently.
The technology behind the remote shutter release is extremely simple. The switch on the shutter release closes a circuit, giving the camera a signal to fire the shutter. This allows simple wired shutter releases to operate without batteries. It is worth noting that while virtually all cameras are triggered using the same mechanism, almost every camera manufacturer uses proprietary connectors. Because of this, some accessory manufacturers make their remote cables detachable and offer different options to fit various cameras. Selecting such a model means that you can keep the same remote even if you switch camera brands, borrow a camera or upgrade to a different body.
Wired vs wireless remote shutter release
Camera remote shutter releases can be broadly divided into two categories: wired and wireless. In both of those flavors you can find a variety of options. They range from simpler models that just provide shutter triggering to the more sophisticated ones. Functions such as drive mode selection, timers, counters and intervalometer capabilities for timelapse shooting can all be found in remote shutter releases.
Wireless remotes are more complicated, expensive and less reliable, but they provide much more freedom and flexibility. They are the best solution if you want to include yourself in the picture without worrying about pesky wires snaking about. In addition, almost all wireless remote shutter release systems can be set to trigger multiple cameras simultaneously.
Wired remote shutter releases
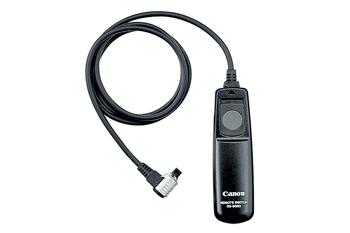
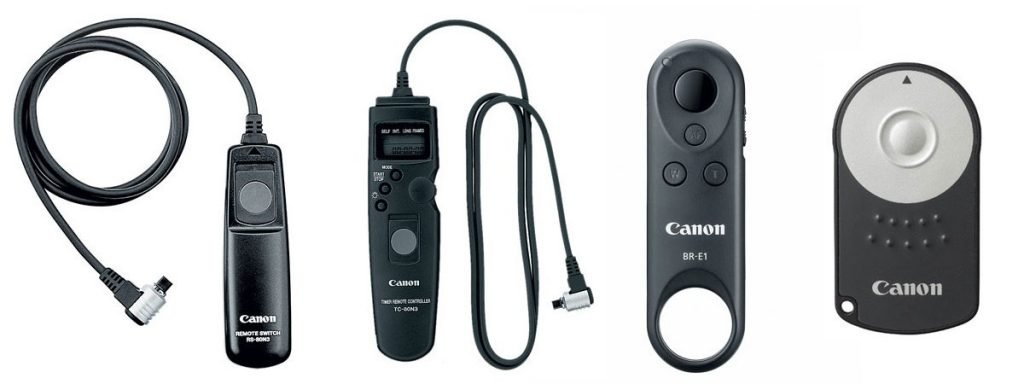
The basic wired camera remote shutter release (like the Canon RS-80N3 pictured above) is, essentially, just a box with a button and a cable coming out. It plugs into the camera, and pressing the button results in a shutter actuation, simple as that. This type of shutter release is pretty much foolproof. It does not require batteries and is by far the cheapest option. Most models have the half-press functionality of a camera shutter button to allow for pre-focusing and metering. However, do not take this for granted, as there are some that trigger everything simultaneously. Furthermore, on some models the button has a mechanism to hold it pressed down. This is immensely helpful when making long Bulb expositions. Without such a built-in mechanism, you will have to resort to duct tape, clamps or rubber bands.
Wired releases are generally cheaper, easier to use and more reliable. On the downside, they limit your distance to the camera to the length of their cable. Because of this, they are not particularly suitable if you want to include yourself in your pictures. Even though longer cable wired remotes are available, you will then need to conceal the cable or have in the picture. Wired remotes are best suited for situations where you are concerned about camera shake. Those include macro photography, long exposures, or when you need the added functionality of an advanced remote.
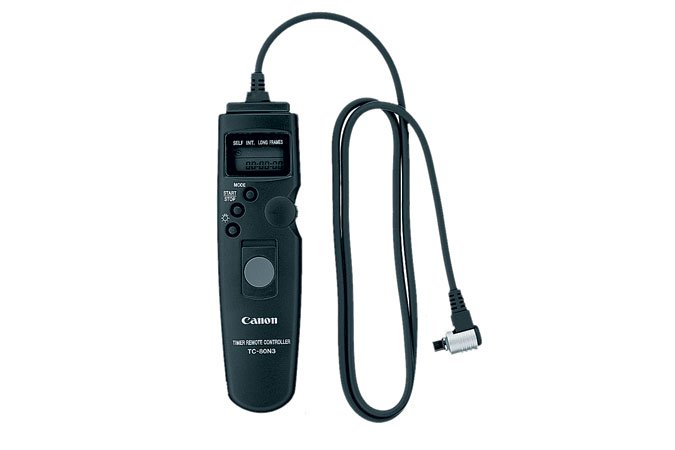
The more advanced wired shutter releases (like the Canon TC-80N3 pictured above) offer timers, clocks or intervalometer functionality, usually paired with an LCD for setup. These remotes are used almost exclusively to produce timelapse sequences. The advanced functions of this type of remotes do require batteries, as cameras generally do not supply power through their trigger ports. However, most of those remotes retain basic triggering functionality even without batteries.
Infrared remote shutter releases
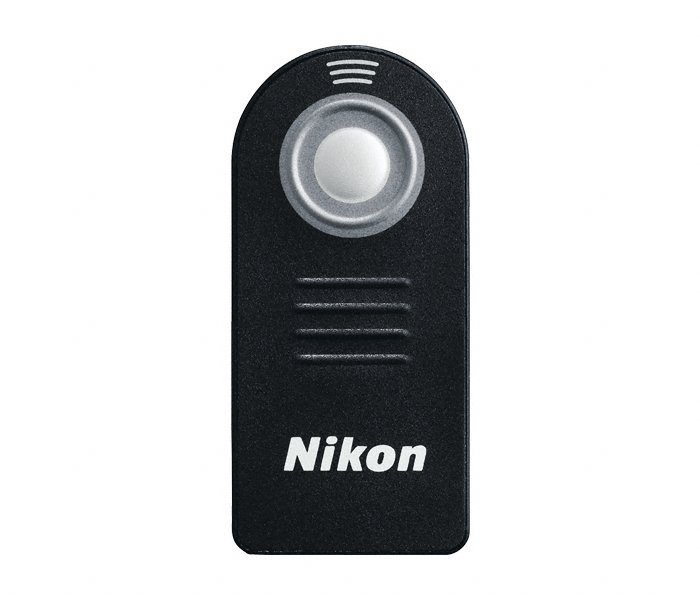
On the wireless side, we have a bit more variety. The cheapest and simplest of the bunch are infrared camera remotes. They are designed to work with the camera’s built in IR receiver, much like a TV remote. An example pictured above is the single-button Nikon ML-L3 IR remote control. Remotes of this type are usually very basic and can just trigger the camera. More sophisticated models that can control zoom lenses on compact cameras or enable preset shutter delay.
Infrared remotes do have certain drawbacks. Not all cameras have built-in support for IR remotes. If you are considering an IR remote, check your camera’s specifications first. Another thing to look out for is that brand name remotes generally only work with cameras of the same brand. Much like TV remotes, there are third party products that support several brands.
As IR remotes rely on the camera’s IR sensor being able to see the remote’s signal, they have limited range and usually require direct visual contact between the remote and the front of the camera. Like TV remotes, IR camera shutter releases need a power source to operate, usually some model of a coin battery. However, because there is battery drain only when the device is actively emitting IR light, batteries tend to last long.
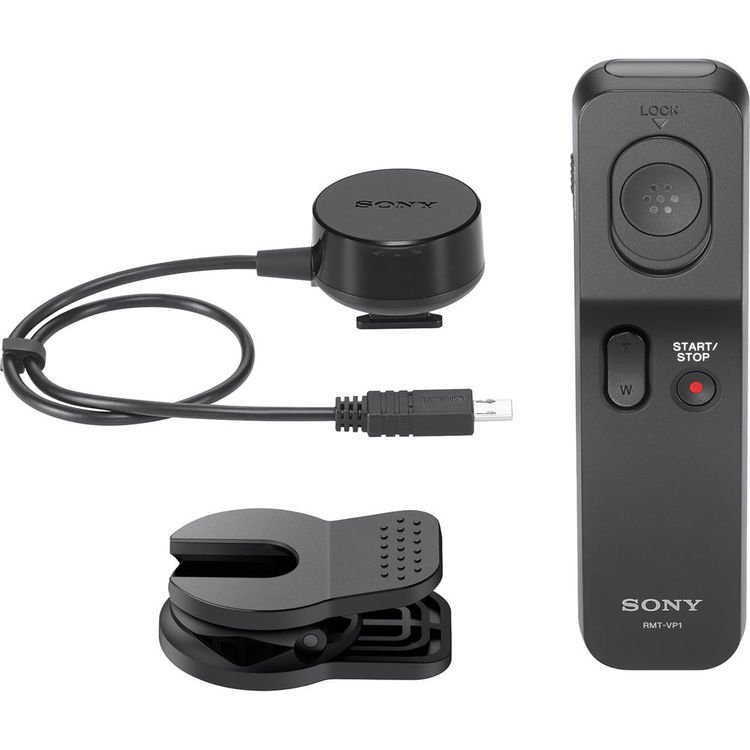
The second type of infrared remote shutter release consists of a transmitter and a separate receiver that plugs into the camera. An example of such a system is the Sony RMT-VP1K shown above. Another similar kit is the Nikon ML-3 that adds IR triggering functionality to models such as the D800 and the D200. There systems are designed for cameras that do not have a built-in infrared receiver. They function much like the radio shutter releases, but have some specific advantages and drawbacks.
Naturally, IR remotes rely on infrared light signals, and therefore need a line of sight between the remote and the receiver. Because of this, you have to mount the receiver on the camera facing the direction from which you will be triggering. It can be placed either on the hotshoe or somehow attached to the camera body if the hotshoe is being used. In some cases, both devices need batteries to operate, making them less convenient.
Infrared camera remotes are also affected by ambient conditions, such as bright sunlight or fog. However, one key advantage of IR remotes is that unlike radio frequencies, which can be prohibited or regulated in certain situations or locations, infrared light of such intensity as used in a remote is pretty much unsanctioned. However, this kind of remotes is increasingly rare in lieu of the now vastly popular radio remote type.
Radio remote shutter releases
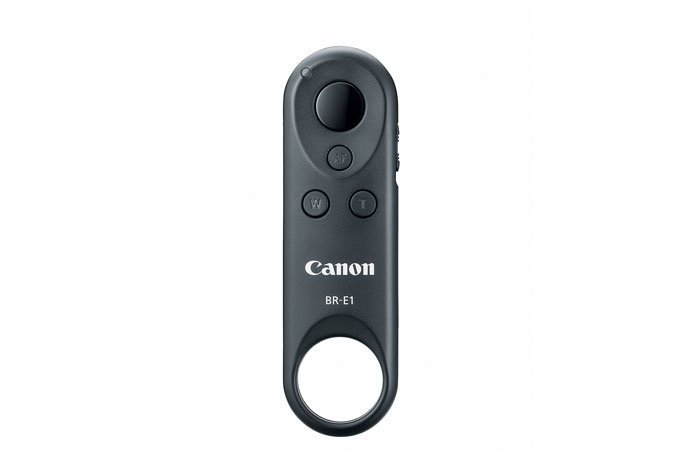
The first and most basic kind of radio remote shutter releases is of the type of the Canon BR-E1 pictured above. It takes advantage of the built-in Bluetooth radio module of most of the company’s recent cameras. There are similar offerings from most of the other major camera manufacturers, They are currently one of the easiest, most affordable and reliable way of remotely triggering your Bluetooth enabled camera.
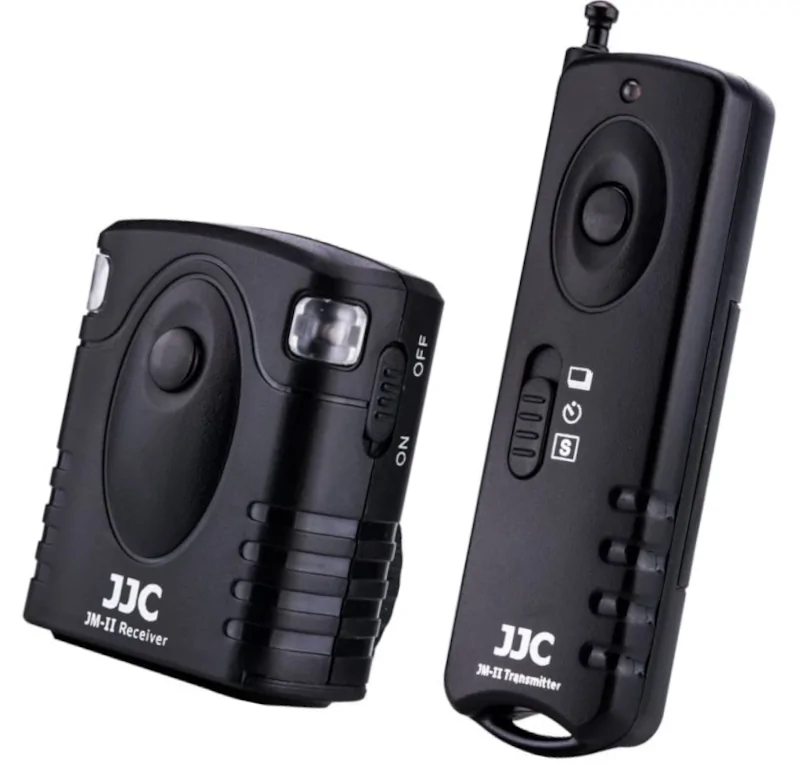
Up the scale we have dedicated radio shutter releases, like the JJC JM-II pictured above. These devices generally feature a transmitter fob and a receiver which plugs into the trigger port of the camera. This is the most basic radio control option if your camera does not have built-in wireless radio functionality. Remotes of this type can be found as both simple trigger-only models and more advanced timer based ones. As these devices operate using radio frequencies, they can have much bigger range. Whats more, radio waves do not require visual contact between the remote and the camera.
However, there is possible susceptibility of radio interference and the abovementioned RF regulations. To help with this issue, some models let you select different operating frequencies to comply with regional requirements. Again, you need to keep track of batteries in both the remote and the receiver. Most of the receivers in such systems do have a backup option. The test button on the receiver usually works even without batteries. This allowes you to operate the receiver as a basic wired shutter release in a pinch. Not ideal, but certainly useful in some situations.
You still have to figure out attaching the receiver to the camera, however orientation is not as crucial here as it is with IR remotes. The more advanced radio remote shutter releases come with multi-channel capabilities. This enables the use of several such systems independently in close proximity. Even further than that we have sophisticated units like the Nikon WR-1. It allows you to view and change camera settings remotely in addition to various triggering options for a single or multiple cameras.
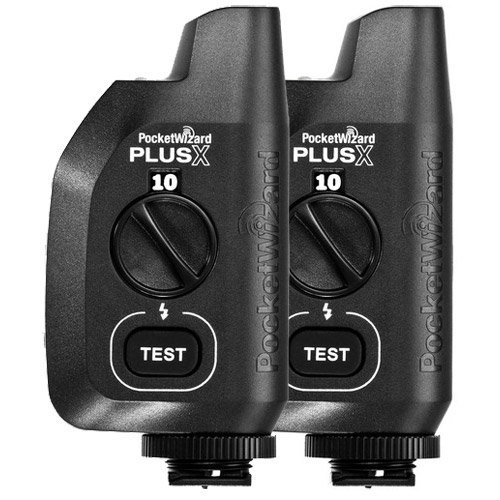
The third type of wireless remote triggers are the radio multifunctional devices which double as flash triggers. They are usually battery powered standalone devices that feature a hot-shoe and a sync port to which a cable with a suitable triggering connector is attached. This is by far the most flexible approach to remote shutter triggering. A system like this can simultaneously trigger a camera (or several) and an off-camera flash (or several) all wirelessly in perfect sync. Sophisticated systems like the Pocketwizard even support flash TTL metering for off-camera flashes, further expanding creative possibilities.
In many cases (like the PocketWizard PlusX above) a transmitter and receiver are both built into a do-it-all unit called a transceiver. The transceiver can switch it’s functionality to either transmitting a trigger signal or receiving one as necessary. You can add as many units as you wish to a system like that, and in many cases you can establish individual zones that can be triggered together or separately.
Other ways of remotely triggering a camera
Apart from dedicated remotes, there are quite a few other ways to remotely actuate a camera shutter. In many cases, these options allow you to do much more than simple triggering. Here’s the most popular ones:
Cable tethering
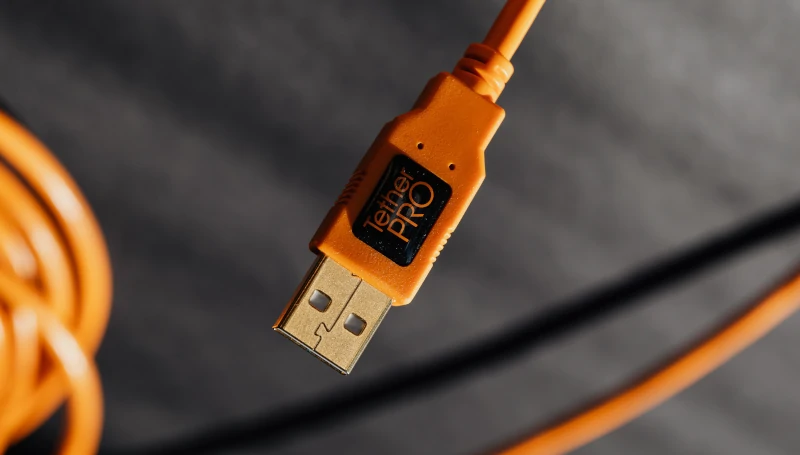
The simplest of those, and the one that has been around for as long as we have had digital cameras is physical (ie. with a cable) tethering to a computer. This is usually done through a USB cable of some variety, and there are specialist cables designed with tethered shooting in mind. Depending on the camera and computer used other interfaces are also encountered. Some professional cameras even support Ethernet connection, allowing for longer distances and higher speed. Once your camera is connected to a computer, the possibilities are nearly endless. A tethered camera can be triggered via the Internet halfway around the world.
Usually the camera manufacturer supplies the necessary software and drivers to connect the computer to the camera. Some third-party products such as Adobe Lightroom and Capture One also support tethered shooting. Once connected to the camera in this way, depending on the camera and software, you are able to preview the image, adjust settings and shoot. The stills or video can usually be downloaded directly to a computer, in addition to being written on the memory card of the camera.
Practically all professional digital cameras and many compact/lower end models support tethered shooting. This is a preferred method of working for many studio product photographers, especially those working with medium format digital cameras. The main limitation of this setup is that you need a computer with you, which is why it is more suited for the studio rather than the field. You are limited to the maximum length of cable that the interface supports, about 5 meters for USB, although there are ways to work around that. In addition, USB and camera connectors are generally not designed with tethering in mind, so care should be taken when handling the camera as cables can be easily disconnected or connectors broken.
Wireless tethering
With more and more technologies being built into modern cameras, it is no wonder that on a modern camera you are more than likely to find one or more wireless communication protocols supported. Most new DSLRs and compact cameras have built-in WiFi and/or Bluetooth support, both of which can be used for remote shutter release and camera control. Setup is usually as simple as enabling wireless network on the camera and connecting to it through a PC, smartphone or a tablet. Again, you will need software or an app. If your camera supports it, this is obviously a much more flexible tethering solution, as it can be used equally easy both on field and in the studio. Wireless communication does take it’s toll on battery life, but such is the cost for convenience.
Why do you need a remote shutter release?
A remote shutter release is one of the most useful accessories that you can have in your bag. So what is a remote shutter release going to do for your photography? In some instances you can substitute a remote shutter release with the camera’s built-in self timer (if there is one), however a remote release gives you much more freedom. Here’s some of the most common situations in which it can make the difference between getting the shot and not.

Long Exposure Photography
Whether you are shooting in low light, trying your hand at light painting or photographing fireworks, a remote shutter release is a staple in long exposure photography. As a rule of thumb, when using shutter speeds slower than 1/X sec, where X is the lens focal length in millimeters (so 1/50 sec for a 50mm lens) any movement of the camera during exposure may introduce motion blur. Using a solid camera support (such as a tripod) and remote release in conjunction with mirror lock-up ensure optimal image quality.
In addition, a locking remote shutter release allows for long bulb exposures which would otherwise be impossible. Many cameras can only measure exposures up to 30 seconds, so you may need to shoot in bulb mode for anything longer. A locking remote shutter release allows you to trigger the camera in bulb mode and leave the shutter open for as long as you wish without holding any buttons.
Even if your remote release is of the non-locking type, holding it’s button instead of the camera’s removes the risk of shaking or displacing it during the exposure. In a pinch, you can successfully substitute the remote release with the built-in self timer to prevent camera shake, sacrificing longer bulb exposure capabilities.

Macro Photography
A remote shutter release is even more important for macro photography than it is for long exposures. When shooting at high magnifications, for example with a macro bellows or extension rings stability is paramount. Pressing a camera’s shutter button a tad harder can severely alter composition or focus, especially if the camera support is not rock solid. In addition, when working with insects or other small, easily scared animals, a remote shutter release will allow you to step back from the camera so as not to intimidate your subject.
Furthermore, as macro photography often requires very small apertures to optimize depth of field, shutter speeds often venture in the long exposure domain unless additional lighting is used. This introduces the risk of motion blur to the abovementioned perils, and if the light level is low enough, you might also need to resort to manually timed bulb exposure. A locking remote shutter release is the answer to all these issues, significantly streamlining and enhancing the process.
Multiple exposure
Multiple exposure, or the process of taking several pictures of the same composition is a technique which is instrumental to many different photographic endeavours – HDR, architectural photography, focus stacking for macro photography among others. The key to multiple exposure is that all images need to be in perfect registration to one another, meaning that the camera cannot move between the shots. This is best achieved using a remote shutter release.
Self Portrait
Last but not least, when you need to get yourself in the picture without the pressure of a beeping self timer, nothing works better than a remote shutter release.
How is a camera remote shutter release used?
Using a camera remote shutter release can range from simple to fairly complicated, depending on your setup. Basic wired remote releases are practically plug-and-play, usually no additional settings have to be adjusted on the camera to enable the remote, just plug it in and fire away. If your remote is of the more advanced type with timer or intervalometer, make sure your batteries are good and keep spares. You may need to refer to the manual for particular set-up procedures.
Radio triggers are a bit more involved in that they require batteries and usually have radio channel adjustments. You need to make sure that batteries in both the transmitter and the receiver are good and that both are operating on the same channel. As far as the camera is concerned, plugging the lead of the receiver in it is no different than plugging in a wired remote shutter release. As discussed above, radio remotes can be affected by distance and RF interference, so if you are shooting fast action or elaborate choreography it’s a good idea to fire a couple of test shots beforehands. This is particularly important when using complex setups with multiple cameras or flash lights.
When using a smartphone or a tablet as a remote shutter release, you generally start by enabling the wireless communication on the camera and then joining the network with your device. Apps for camera control are usually issued by camera manufacturers, although there are third-party options.



I found the article very informative. I have been using remote shutter control for photographing birds visiting my bird feeders and baths. I use a fixed focus on the bath middle, and a remote shutter so that the birds are unaware of the changes around and it is possible to get good shots otherwise almost impossible. I use a JM-II system of transmitter and receiver to trigger the camera from almost anywhere in my hours