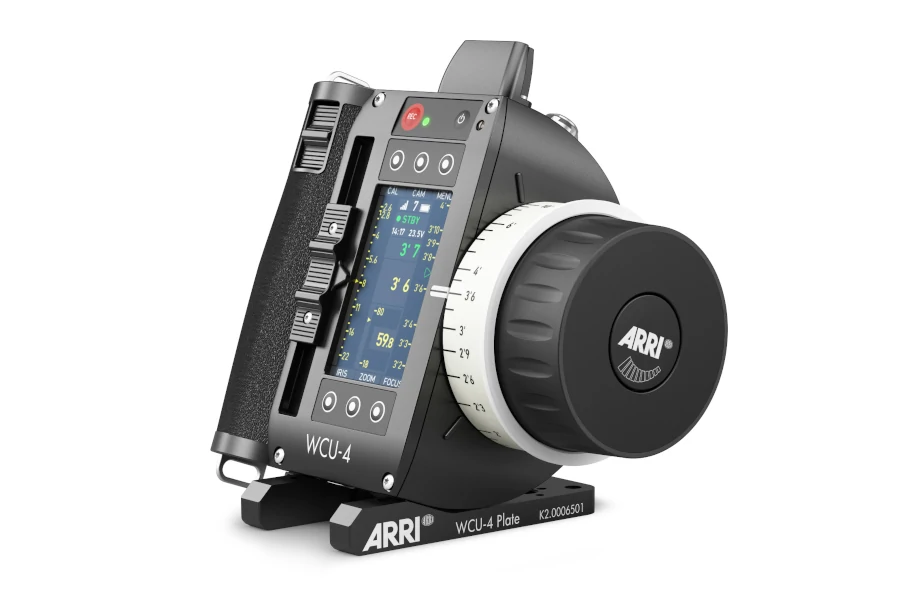
Exceptionally popular among focus pullers the world over, ARRI’s WCU-4 hand unit is at the heart of one of the most advanced wireless follow focus systems on the market. However, as any piece of equipment, it’s not without it’s quirks and hiccups, so let’s see what may go wrong, and how you can fix it.
USER button not working
One of the most common issues WCU-4 users face is the intermittent or downright non-working red USER button located on the top edge of the hand grip. Several rather useful functions can be assigned to this button, including a few not available through any other way – electronic focus marks (aka Knob Marker), focus tracking and zoom zap. So, you can see how frustrating it can be when this button acts up.
The issue with the USER button is a mechanical one – the contacts within the button itself are prone to oxidation, and the process can be accelerated if the unit’s used in a humid or salty environment. With the limited access to the button, there’s not much that you can do to remedy the situation. What usually helps, albeit temporarily is a shot of contact cleaner at the base of the button, followed by a bit of a workout – pressing the button rapidly to work the cleaner in. While it’s pretty safe, it’s a good idea to do this procedure with the unit off and without a battery, just in case.
Once you’ve given it a few dozen clicks, dry it up with some canned air and boot up the hand unit. If the button still does not work, or works intermittently, you can repeat the procedure.
Signal issues
A very common complaint that plagues the entire ARRI lens control system is the unreliable wireless performance of certain units in certain situations. It can be a very tough issue to resolve, as the causes for poor RF performance can be very wide ranging – hardware defects, interference, improper configuration or any combination thereof. However, here are a couple of the more frequently encountered issues with which you can start your troubleshooting process:
Connector problems
There is a well known issue with the LCS antenna connector on early (2017 or earlier) Alexa Mini bodies. The connector would wear to the point of not providing adequate connection between the camera’s radio module and the antenna, resulting in a severely limited radio range. ARRI is aware of this issue, and most of the problematic bodies have already been fixed, but there’s always a chance of you bumping into one out in the wild. If you experience consistent connectivity issues, consult the owner of the camera whether the connector has ever been serviced.
Fixing this requires opening the camera body and replacing the antenna connector and the cable to the internal radio module. Unfortunately, this is not a fix that would typically be done in the field, but should be well within a rental house’s capabilities. If you encounter such an issue on set, and you have a motor controller (AMC-1 or a UMC-4) or an cforce RF motor available, try them instead of the built-in radio. If the issue is resolved, you know the problem is with the camera body.

Interference
Barring a hardware defect, by far the most common cause of wireless troubles is plain and simple interference. However, more often than not, finding and fixing RF interference is far from plain and simple. Nowadays, pretty much every piece of gear on a film set uses some sort of wireless connection. From the sound department mics and monitoring headsets, through lighting’s DMX dimmers and WIFI LED fixtures all the way to special effects’ pyro controllers and grip’s headsets. All of this, on top of the regular RF background of whatever location you end up in, can make for a very crowded airspace.
If you suspect RF interference, the first place you can start your troubleshooting it is your own department. Have a look at Peter Marsden‘s excellent wireless lens control map to see how the different lens control systems channels are positioned within the 2.4Ghz spectrum. You can begin by making sure the different devices you’ve got control over use non-overlapping channels. Furthermore, if you are in a studio with multiple productions on, it pays to check what channels your soundstage neighbours might be using.


Drifting zoom rocker
A relatively less common issue, the integrated zoom rocker of the WCU-4 does sometimes get out of alignment. In addition to zoom control, the rocker is used to navigate through menus and in lens mapping, so a misbehaving one can quickly stretch your nerves. Luckily, there’s a quick and easy calibration procedure you can follow:
CAUTION: Be very careful with the SERVICE MODE, messing with it can render your hand unit inoperable. Stay away from the KNOB calibration page, unless you have the special ARRI calibration ring on hand.
- Navigate to the RADIO menu, and using the top middle soft button switch the WCU-4 internal radio transmitter OFF. Also, unplug any cables plugged into the LCS port of the hand unit. This is done to avoid interference during the calibration procedure, and to prevent any connected motors from doing unwanted adjustments.
- Make sure the battery in the hand unit has sufficient charge.
- Switch off the hand unit.
- Turn on the unit in service mode by simultaneously pressing and holding both upper and lower center soft buttons and the power button until the SERVICE MODE main screen appears.
- Press the upper left soft button marked ZOOM, which should take you to the STICK SETUP page.
- Without touching the zoom rocker, press the bottom center soft button labeled ADJ-0.
- Press the top right soft button labeled BACK to exit STICK SETUP.
- Turn the hand unit off, then boot it normally. The drift should be gone.
This procedure is described in the WCU-4 User Manual. If after following it you still experience zoom rocker drift, the unit most likely will have to visit an ARRI service centre.
Control conflicts
When using more than one controller in a wireless lens control setup, there’s always a possibility of control conflict. This happens when more than one device tries to control a particular lens motor. For example, the focus puller is controlling the focus motor with the WCU-4, but the DIT wants control over iris with an SXU-1. Naturally, you set both the WCU-4 and the SXU-1 to the same radio channel to match the camera or UMC, but you can’t get it to work.
First, switch off control of the zoom axis from the WCU-4 hand unit:
- From the main menu of the WCU-4, navigate to CONTROL SETUP and select it.
- On the control setup page, you can see which interface is mapped to which of the lens axises – typically knob to focus, slider to iris and stick to zoom.
- In our example, we want to give control over the iris axis to the wireless SXU-1, so we navigate to the SLIDER SETUP page by pressing the bottom left soft button labeled SLIDER.
- Once in the SLIDER SETUP menu, select CONTROL and press the bottom right soft button labeled CHANGE until you set CONTROL to OFF.
- Exit the menu using the top right soft button labeled BACK
Second, get into the SXU-1 menu and make sure it is set to control the IRIS axis.
Finally, switch off both the WCU-4 and the SXU-1. Then, turn only the SXU-1 on, wait for it to connect to the camera or UMC, and verify you have control over the iris motor. Once you have done this, turn on the WCU-4 and check if you still have control over focus and/or zoom through it.
You can follow the same procedure to hand over control over the zoom axis (to a ZMU-3 with a WZE-3 attachment, for example), you just need to turn off CONTROL in the STICK SETUP menu.
If after doing this you’re still experiencing issues, make sure all the devices, especially the WCU-4(s), are using the latest firmware. ARRI did report and fix a couple of bugs in this department over the years, so if the unit you’re using is running an older firmware, it may be part of the problem.
Motors resetting / CAL prompt
Many Alexa Mini / Mini LF or c-force RF users experience sudden, seemingly unprovoked prompts by the system to calibrate the c-force motors, disabling focus control. The issue can occur even while the camera is rolling, which can be fatal for a take, so it’s something to be taken seriously. It can sometimes happen due to RF interference, especially when using third party LBUS cables, which may not provide sufficient shielding.
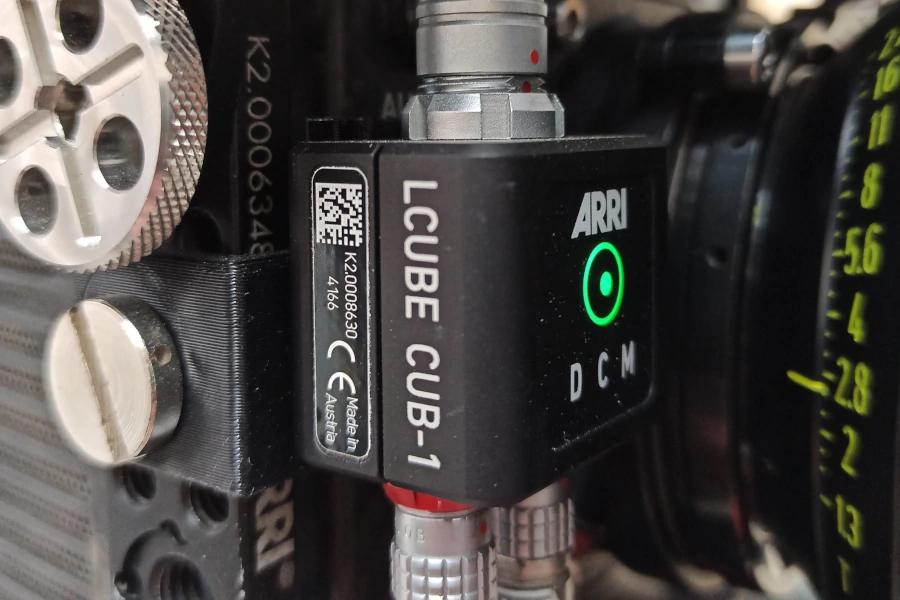
However, in the vast majority of cases this problem manifests due to power issues. The LBUS system needs 12V to operate correctly, and if, for whatever reason, the voltage dips below this threshold, the motors reboot, prompting a calibration request. Due to voltage drops and losses in the system, this can happen any time the camera is running on less than 13.5V, which is why ARRI’s default battery warning is set at this level. The more devices you are running on the LBUS chain (multiple motors, LCUBE, Master Grips etc.), the higher your voltage threshold has to go to ensure proper power delivery to all of them.
Apart from monitoring battery voltage, to counter this issue you can also feed power directly into the LBUS chain via the LBUS to RS cable (K2.007659) or an LBUS to D-Tap cable (K2.0006758). These plug into the second LBUS port of the last device on the chain, and feed the full battery voltage into directly into the LBUS chain, greatly reducing the risk of voltage drop calibration prompts.
For LBUS configurations where no spare LBUS ports are available (when the chain ends with a c-motion pan bar zoom module, for example), ARRI also makes the LBUS Star cable (K2.0039875). It has two LBUS connectors and works like a regular LBUS cable, but it also has a female RS connector which can be used to provide additional power.
Another, lesser known option of improving your LBUS power situation is available when you use a Cinematography Electronics Cinetape rangefinder with an LCUBE and the ARRI serial data cable (K2.65063.0). The data cable allows for power to go between the LCUBE, and respectively the LBUS daisy chain, and the Cinetape control box. This means that you can run the Cinetape off of LBUS power, which can be useful in certain situations. More importantly, however, it means that you can power the Cinetape through its 3pin RS port, and have that power feed into the LBUS chain without any additional cabling.